Friday, November 11, 2016

There's No Place Like Home

A while back I was hungry for a new project to try out at home. I searched throughout the internet, checked out pinterest, practically camped out at Michael's, and finally settled on a fun little project for the home.

I was really excited about this one because so many projects in this home are not a year-round, so many go into storage until the next year. Often, so much time is put into a project and then a few months go by and it goes right back into a box until next year (when I have probably done another project instead).

So this fun little HOME sign with interchangeable "O" letters seems to be just the ticket!

So here you have it, the HOME letter project.


So first step was a stop off to my local craft shop to take a look at the letters I will be using for this project.  I settled on the white ones pictured below from Michael's.


I also chose a few wood shapes for a few holidays and seasons coming up.

I also picked out small cross slice of a tree branch similar to a previous pumpkin projects I was working on. 

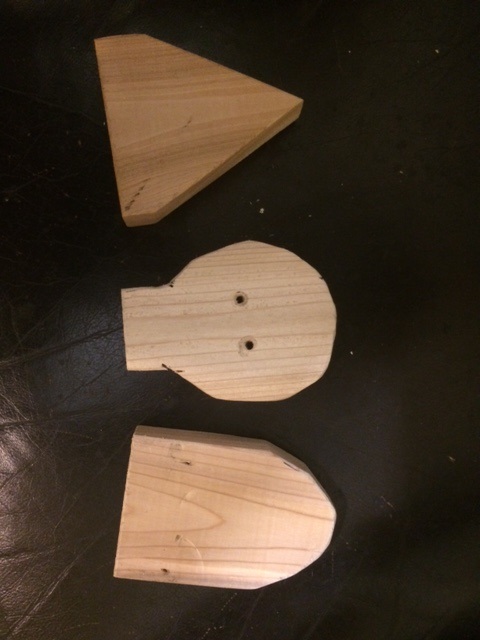
Additionally, I cut a few shapes at home from some of the scrap wood I had from other projects.


At home, I painted the first coat of white, brown, green, or orange onto all of the shapes, and then painted each of the H M E letters black and waited for them to dry.


Once everything was dry, I sanded the edges of each of the shapes and the letters to give them all a weathered look. 


 With all of the sanding completed, I went on to create the various shapes that would replace the "O" in the word HOME.

The first one I worked on was the pumpkin. Heading back to the similar techniques I used on the Pumpkin project a few posts back, I just created a mini version of it.


About three years back, Anna Williams and I made a set of turkeys with some 2X4's, paint sticks, and popsicle sticks.  I believe I blogged a little bit about them in a previous post. As time has gone on, they have lost a few feathers and have gotten a little rougher along the way. So I decided to take them and take the conglomerate of three and make a smaller one for this project.


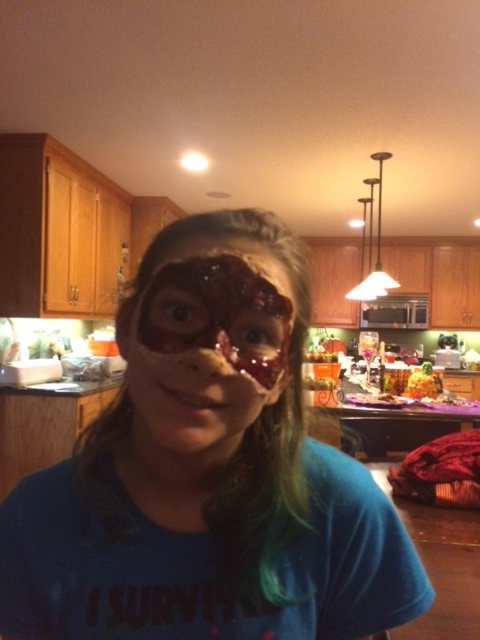
I wanted ot have a fun one for Halloween and chose a sugar skull as the shape that I wanted to make the filler letter for the "O" in this round. Using fun printed papers layered on with Mod Podge,  and a collection of dimensional stones and shapes to embellish the skull, I went to work adding a few details to give it a sugar skull look. 


 I also completed a Christmas ornament (Sorry, I forgot to get a photo. I will add it to the post later!), an Easter bunny, a Valentine's Day heart, and a snowflake (sorry, no pic of this one either).I had also tried to make a Christmas tree as one of the shapes, but I will caution you now on that as it ended up looking too much like it said HAME instead of HOME. So

I ended up scrapping the tree after some hard deliberation.

Here are a few of the other shapes I had made: 


Now it is your turn! Create a great HOME display that you will put in your home or gift to a friend! Not sure you want to (or have time to) make this one yourself? I am taking orders now to complete a few of these for your Holiday gifts. They are just $35.00 and will include four shapes/holidays of your choosing. 

As always, please be sure to subscribe, follow and check out my website for more classes and fun I can offer to you!


Tuesday, November 8, 2016

A FEW Days Late

In the process of trying to get everything sorted out in all of my pictures etc. I realized I hadn't posted all of the costumes I put together for Hallowe'en this year.

Please enjoy!

My youngest was a roller skating waitress: 


 My Middle child dressed as a Seeker for the Ravenclaw House of Harry Potter: 


And you have seen the post of my eldest and her face "totally ripped off": 


 And my Red Ridinghood:


I helped out making a few others for the holidays too. 

An Olive Oyl


And  a Squirtle


I hope you all enjoyed the costumes! 

Please share your Halloween pictures with me! I would love to see what you wore or made for the fun holiday! 

Next year, if you have a costume you'd like to have made, I would love to do it for you! Contact me and check out the website at www.oakgrovecalicocrafts.webs.com

Please follow, share, and comment!

Tuesday, November 1, 2016

You Might Want to Get That Looked At

Halloween has made its exit again this year and now I have a few minutes on my day off to reflect back on all of the fun and busy activities of the weekend.

Each year when considering my own costume, I like to explore different opportunities to expand a skill or technique that maybe I haven't played with much before.

This year, I decided to make it make up and special effects. So I scoured around the internet and came  across a few really neat looking gore style looks and settled on a red ridinghood look for this year.

The costume was a pretty simple skirt and shirt look that I sewed from the collection of fabrics I had on hand. This year the focus was mainly on the makeup.

I started with a clean, moisturized face.

Using liquid latex, I ran an old brush down my face in four strips.


I let it dry between applications and coated the stripes on my face twice before applying a third coat of latex and then strips of tissue to my face. Let me say here that I have a textured tissue and think I may have had better luck with a thinner and less textured tissue that would have both soaked up the latex and left a thinner and more realistic layer to the face. 


I then did my first coat of foundation onto the tissue and then the rest of my face. I did a second round after this layer dried so that it had a very full coverage. 

I then took a fine scissors to the middle of each line of tissue and cut up the middle of each one. Don't worry about the tissue ripping a bit or not having a perfect cut to it. This just makes it look all the more traumatized. 

I do want to note, that all mothers around the world should cringe a little bit right now, I am telling you that what I did was take a scissors to my face. BE VERY CAREFUL if you decide to try this... you don't want to slip when getting close to your yes. I made sure to move my other hand over my eyes to protect them in case I'd slip. 

Once I had the slits in the tissue, I needed to do a little bit of reinforcement of the tissue where it slipped off my skin. I also pulled occasional sections off the skin a little more inside the cuts to help give the scratches a little bit more depth to the cuts.

Using my eye shadow, I slipped a little brown and purple shadow into the inside of the cuts, That way, when placing the "bloody scab" liquid into the cuts, my Caucasian skin wouldn't lighten the blood look sometimes making it look a little bit pink instead of red. Then, around some of the places under each of the connections of the latex to my skin, I also placed the shadow to both hide the seams a bit and to make the skin look more traumatized. 

I then used a fine paint brush to layer in the "bloody scab" makeup I purchased at a hallowe'en costume shop.

Adding clip extensions to my hair, completing my "normal" makeup, and attaching eyelashes to my lids, I completed the makeup look before getting all dressed up for the night. 


Feeling pretty good about the look, I decided to finish it off by adding a creepy white out eye to lend to the trauma of my scratch.

And there you have it, I am Red Riding Hood, scratched by the wolf. 


Please enjoy and give this technique a shot to see what you can do with it too! 
Send me a picture and I will share it here!

Have fun! 

Don't forget to follow, share, and join me on my new website!


Sunday, October 30, 2016

Like, I Totally, Like, Ripped My Face Off

In my house, I have developed a bit of a reputation to be able to produce what my kids request for Halloween each year. So as time goes on, the requests have continued to become more complicated and specific.. and I continue to try to fill said requests.

This year, when asked what she wanted to be, my thirteen year old said the following, "I, like, totally want to be this, like, masquerade girl that totally is in black colors. But then I didn't get a mask, so I, like, totally ripped off my face to make my own mask." 

SO, I took a look around Pinterest, image searches, and more and settled on a plan for Terra's costume this year. 

After sewing the costume, the big trick was the mask/face.

I started with a plastic mask I had found at Walmart. This one was just a few bucks and had a bit of lace attached to it along with an elastic band for it to go around the head. 

I  removed the lace and the elastic from it and using Mod Podge and toilet paper I covered the mask with three layers of paper. 

When dry, I trimmed up the edges of the mask and put two layers of foundation on it the closely matched my daughter's skin tone, and then set the liquid with loose powder. 


Once the foundation had set, I started to add the gore. I purchased a bottle of "bloody scab" makeup from the costume shop, and then added additional additional shading and bruising with eye shadows, corn starch, and food coloring. 

Terra's makeup was created with a series of layers of toilet paper, latex, and the same process of corn starch, eye shadow, and "bloody scab" 


And there you have it! My daughter now totally looks like she ripped her face off.  Please enjoy the final product pictured below. :)


Have you read? I have a new website and can create things for your next Halloween, Renfest, Party, or event. I also have some great home made gifts, and classes! You can check it out it www.oakgrovecalicocrafts.webs.com 

As always, follow, subscribe and join me on my next crafting adventure.