I direct and own an international beauty pageant. (what a way to start a blog, eh?)
ANYWHO....
So the pageant that I am running currently raises funds and awareness for childhood cancer research. I have had two years of some of THE most amazing queens EVER and am so lucky that this pageant has really picked up like it has. If you want to check it out, go take a look at www.globalunitedpageant.com
So one of the things that I ask of my contestants is that they bring silent auction items to the pageant to auction off for our charities. Since the pageant is international, there are a lot of really cool items that come from all over the world to be auctioned off.
This year, one of my contestants (now one of my queens) brought two really cool shadow box creations made from broken jewelry and crowns (VERY fitting for a pageant queen) and I bought one of them. This one was really neat and now hangs in my office space. It was in the shape of a crown! CREDIT TO AUTUMN KASTEIN FOR THE INSPIRATION ON THESE!
So a few weeks later when an auction was looking for items to benefit a person who needed help with their medical bills, I and my St Francis Women of Today set out to make one of these to be auctioned off! it was in the shape of a snowflake and (in my humble opinion) BEAUTIFUL!
So when my husband asked me what he should give his staff this year.... I knew right away what they needed: THIS!!!!!
Here is what I made:
(seriously, the photos don't do this justice at all! It is soooooo sparkly and shiny!)

AND here is how you do it!
Admittedly, these aren't the easiest craft AND they can get expensive if you don't have some of these items or need to find them. Luckily for me, I have a lot of broken crowns, so that helps! Many of you may not have those, but searching ebay for broken rhinestone jewelry and junk jewelry may find you just what you need. Depending on what you already have at home, plan on spending somewhere between $20 and $50 on each one. The more you make, the cheaper it will get because you can split up the jewelry lot and glue etc.

A shadow box that is the appropriate proportions or shape of the object you are going to make. (a snowflake will look better in a square frame, a tree would look better in a rectangle frame, for example)


My favorite adhesive E-6000... careful! This stuff is SMELLY!!!!
and Tacky Glue.

A lot of broken jewelry. I bought a lot from ebay of 5 pounds. this filled 7 frames of 8X8 snowflakes and 9 8X10 Christmas trees. I probably threw out about 2 pounds of it though because it was stuff that had no use for me later in crafting or was beyond repair/hope. I also had the broken crown parts to fill it with, so this lot of 5 pounds didn't fill the WHOLE thing.

Also on ebay, I purchased 10 yards of rhinestone chain. I chose AB (Aurora Borealis) stones because they REALLY sparkle and most of my broken crown parts are also AB.

A bag of broken crown parts. These are crowns that I broke intentionally or were damaged in shipment to me. You could purchase broken rhinestone jewelry instead or cheap kids' tiaras on ebay.
 | |
Now find the shape you want to use in your shadow box. I printed off this snow flake to work in the shadow box. Anything that has lots of detail or holes inside the shape will make the image harder to see in the shadow box, so searching for key words like "coloring" or "outline"
|

Outline the image with E-6000 and then the rhinestone chain. pull the paper outline off and your chain should be in place to fill the image. At about this point, my Women of Today chapter also started wondering what we should give our chapter president for Christmas. She had loved the one we all made for the auction, so we decided on one of these for her. This is when I realized that I was gonna need back-up! (that meant I had 7 of the snowflakes and nine of the Christmas trees to complete) So in came my friend Anna (see my earlier posts about painting anything that is a 2x4) and, again, it became "Crafting with Wendy and Williams"!

Using the Tacky glue, and taking peices of jewelry, beading and broken crowns, Anna and I filled the rhinestone outlines with various bits and pieces. Only if the pieces overlapped with another piece of jewelry, then we would use the E-6000. We tried to limit the E-6000 because its vapors are so potent. If we knew that a charm, a piece of jewelry or whatever related to the recipient, we filled those pieces into the outline. (for example, one recipient is a cancer survivor and a teacher, so a little pink ribbon and a school house pin we found went into her snowflake) These became kind of a fun "I spy" decoration and every time people looked they found something new inside.

And done! As this one was drying, the Tacky Glue would become clear and we would find gaps to fill. This is the snowflake before we filled the gaps. The less black you can see in the image, the better, we think. Don't be afraid to overlap pieces and ad depth to the collage. The parts don't all need to lie flat in the frame. Just be sure that the parts aren't going to be taller than the gap of your frame from the background.
We then did the same for the Christmas Tree frames. The only difference is that we didn't outline them with rhinestones because we found the trees looked better kind of "organic" in shape without the outlines.
Here are some images of our process with those.


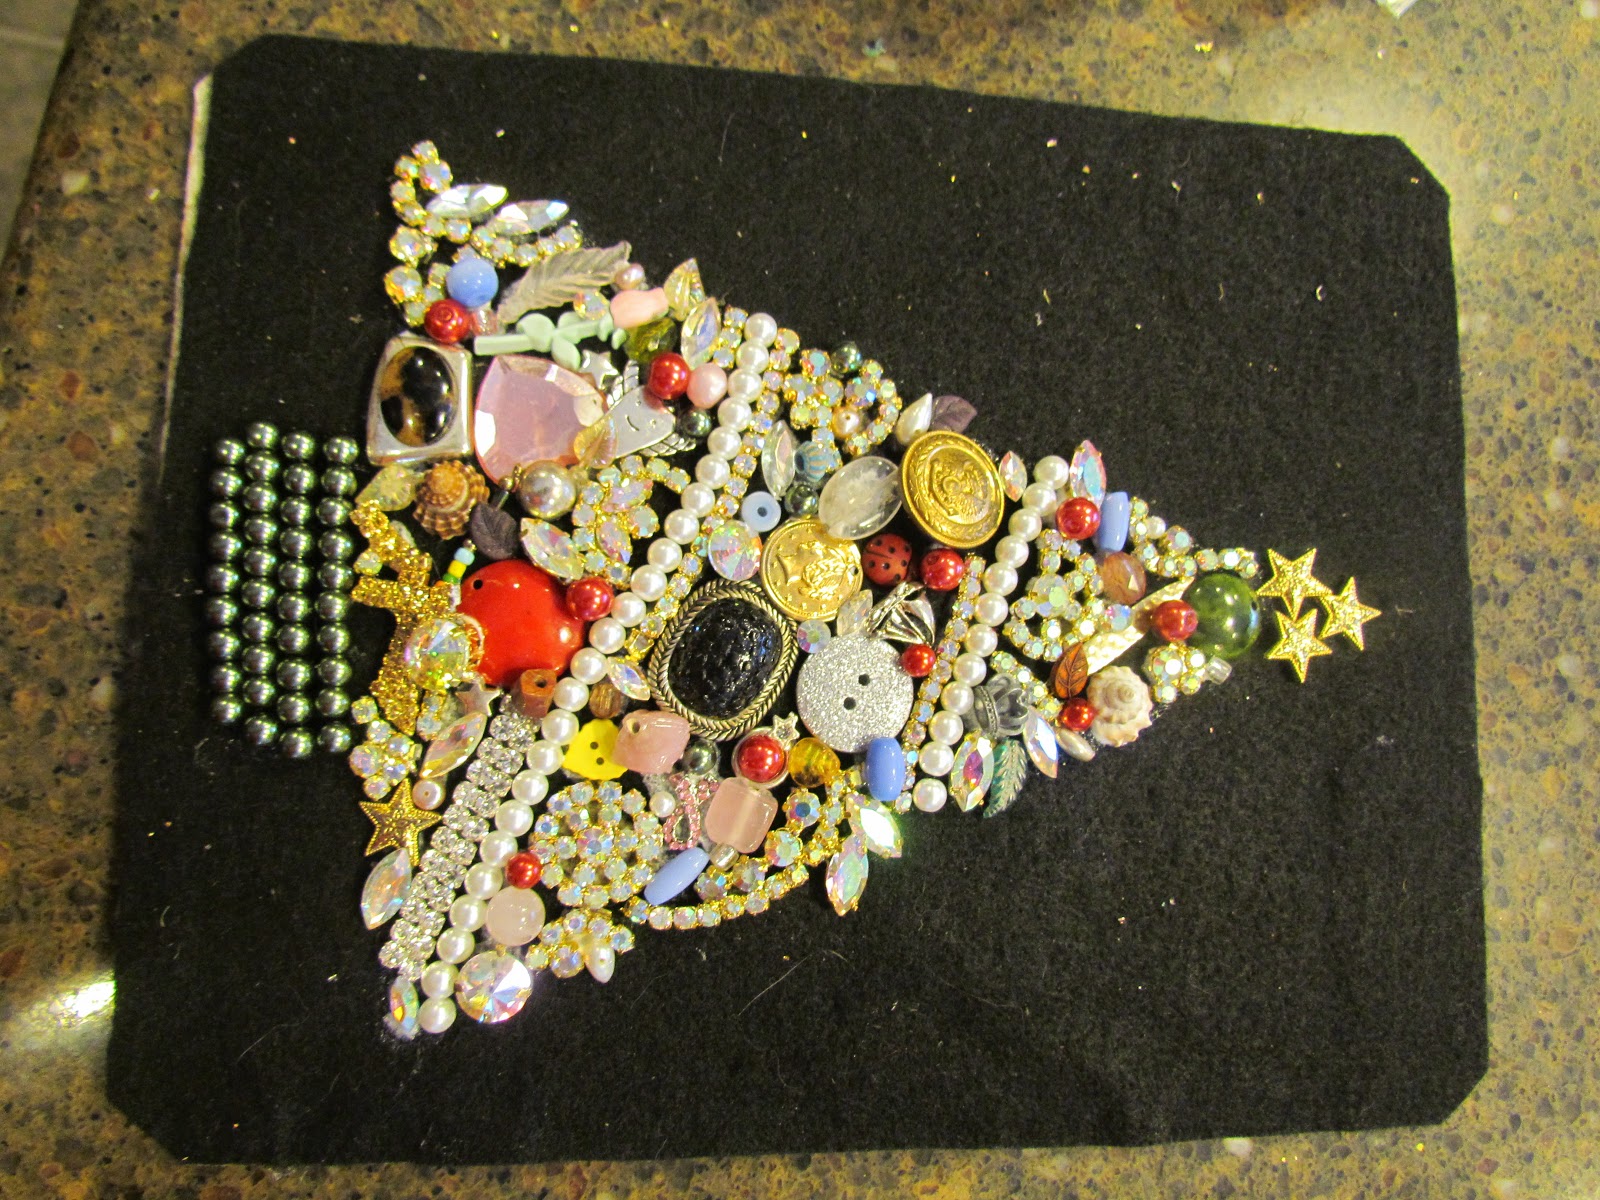
These did need a little clean up afterward of the background black color, then they were perfect for the frames! :)

Do you have a shape that you tried? SHARE WITH ME HERE!